Fujifilm Film Simulation LUTs for Panasonic G9/GH5 V-Log L/HLG
What is this?
This is a pack of 3D LUTs that convert Panasonic G9/GH5's V-Log L & HLG to the following Fujifilm film simulations in DR200 mode:
- Provia
- Velvia
- Astia
- Classic Chrome
- Pro Neg Hi
- Pro Neg Std
- Eterna
Each LUT comes in two versions, the normal contrast (NC) version emulates the following settings:
- 0 Shadow tone
- 0 Highlight tone
- 0 Color
The low contrast (LC) version emulates the following settings:
- -2 Shadow tone
- -2 Highlight tone
- -4 Color
Requirements
- Shoot in either V-Log L or HLG.
- Correct white balance, I recommend doing custom wb using a gray/white card before shooting. Best results will be achieved in daylight.
- The LUTs expect correct exposure for V-Log L and 1EV overexposure for HLG. This is not a strict requirement, I give you LUTs to modify exposure.
What else is in the package?
- Exposure modifier LUTs that range from -3 EV to +3 EV, in 1/3 stop increments.
- Full to legal range conversion LUTs for Davinci Resolve, Premiere Pro, and FCPX.
Order of operations
- V-Log L only: check your data levels.
This step is not required if you use the in-camera recordings in the latest versions of the editors mentioned, but it might be necessary when using externally recorded footage.
Panasonic's V-Log L recordings are full range, and they should be interpreted as such, that's what my LUTs expect.
Just import the reference black image into your timeline (it's in the FixLevels folder), shoot a short clip with the lens cap on, import that as well, and compare the black levels.
If they match, you're fine. If they don't, and you're in Resolve, go to the Media pool, select your clips, right click, go to Clip attributes and select "Full" at Data levels.
In Premiere Pro go to Effects, and choose Lumetri Presets -> Technical -> Full to Legal range, and choose the bit depth corresponding to your footage.
Alternatively, you can use my level adjustment LUTs in the FixLevels folder, there is a separate version for Resolve, Premiere and FCPX. The FCPX version should be applied via the built in Custom LUT tool. - HLG only: convert your clips to V-Log L with the LUT inside the HLG folder.
- Change exposure with the included exposure modifier LUTs if necessary.
- Do white balance correction if necessary.
- Apply the film simulation LUT.
Attention HLG shooters using Adobe Premiere!
At the time of writing this page the latest version of Adobe Premiere (v14.9.0) still decodes H.264 HLG footage incorrectly.
It uses the Rec.709 matrix coefficients to convert from YUV to RGB, instead of the Rec.2020 ones.
The result of this is a slight color shift that makes my LUTs inaccurate.
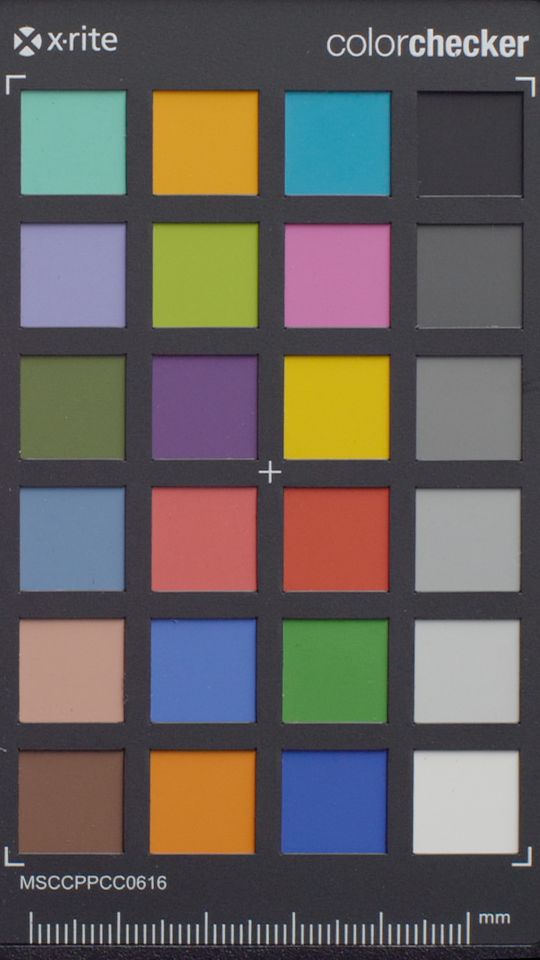
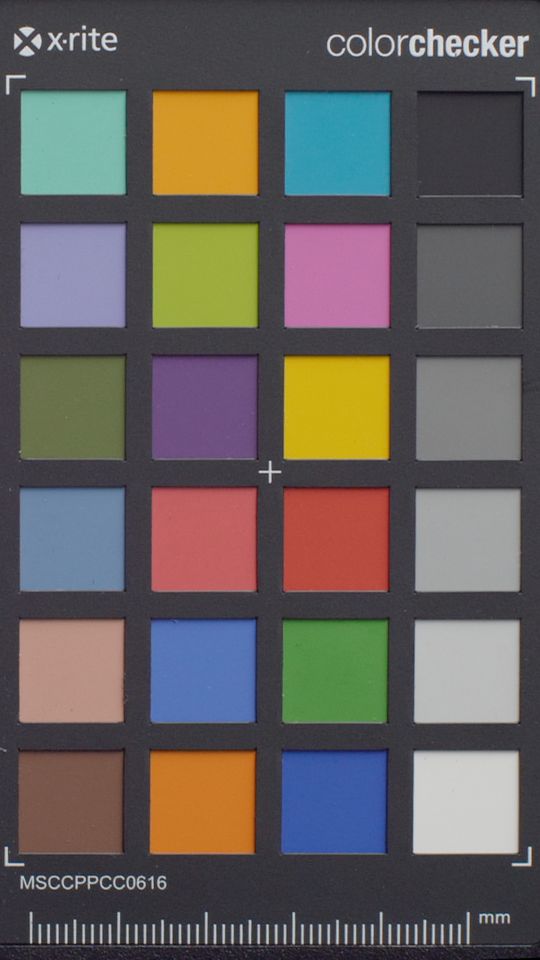
To visualize the issue I show you two color charts, the first one is decoded with the wrong matrix, the second one with the correct one.
Open them in separate tabs and switch between them to see the problem.
| Bad conversion: | Good conversion: |
 |
 |
One possible solution is to use a correction LUT from my Technical LUTs package.
The "bt.709_to_bt.2020_premiere.cube" is the one the fixes this issue. If you decide to use this LUT, use it before anything else.
How accurate is this?
I measured more than 10000 color patches for each profile, and I used my own color conversion engine to build 3D LUTs from these measurements.
The LUTs are very precise in daylight and they have smooth color transitions throughout the whole color space.
Purchase
Secure payment is processed by LemonSqueezy, a subsidiary of Stripe, Inc.
Normally I don't offer refunds, but you can send me links to some of your stills or short movie files, and I'll apply the product to them. This will cost you nothing and you'll know exactly what to expect.
| Colorizer Panasonic G9/GH5 V-Log L/HLG LUT Pack | €35 | (Net price, applicable taxes may apply) | BUY NOW |